Wednesday, May 30, 2012

Better Photos using salt as fixer

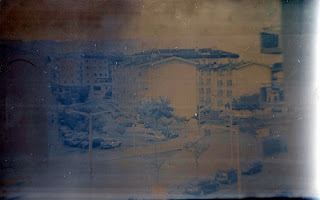
My most seen photograph in Flickr is the one shown below. I used a Holga camera 120GN, Parodinal as developer and salt as fixer. This picture is from a black and white film, Fomapan 100 ISO, digitized with a cheap Olympus FE4050 and treated in GIMP. Incredible, I still can't believe how that was possible

Black and White like color
Add caption
The last photos I made with the same film, better quality cameras, and using the same developer but normal fixer of ammonium thiosulfate, don't look so good. I came to the conclusion, comparing the negatives, that the films fixed with salt are much more transparent, they have no fog at all and this, alone, is a reason for me to start using salt regularly as fixer. OK, it needs time, it needs temperature. But I have both, time and how to keep the bath warm. 3 hours are enough to fix with very concentrated salt, minimum 300 g / liter.

Spring comming
The same photo but desaturated of color.

Sunday, May 27, 2012

Is it possible to use hair dye instead of CD-4?

I can't answer yet to this question. All experiments I have done until now, show that hair dye containing PPD or PPD-derivatives is a very weak color developer, you need almost to bypass bleach to get a negative that contains some vestiges of color. These colors may be then «developed» with a software like GIMP.
But I am still trying to achieve better results. It is sometimes disappointing, and if you don't take notes of all details, it may give a satisfactory result that you can't reproduce again, maybe it was another film brand, maybe the new bottle of soluble coffee is different or something else that you can't explain. By the way, I already explained why I am using coffee in some earlier post. In one of my first experiments with color negative film, I tried B&W reversal cross-process and with help of software I could extract some color. On the other hand coffee is acid and helps you to adjust the pH of the developing bath.

One of my last failures with hair dye gave monochromatic pictures like this:


Thursday, May 24, 2012

Sodium Sulfite III

In Photography, like sodium carbonate or sodium hydroxide, sodium sulfite is very useful. It is used in developers to prevent oxidation,it is used, like already said before to prepare the fixer of sodium thiosulfate boiling a solution of it with sulfur, and it is also a hypo removal.
I already announced that I discovered a seller of sodium sulfite, sold as chlorine neutralizer for pools. Here is the package of 6 kg I received today:
It cost 45 euro with shipping. Came from Spain but there is an importer/seller in Oporto, Portugal. From them I got the stuff:


I do not need to prepare sodium sulfite anymore with sulfurous acid and sodium carbonate. But it is always good to know where you can get what to use in photography.

From now on, I can say that I have almost all essential products for b&w and color photography, without depending on a Photo brand. Well, I need the films of course. I am not thinking of making film myself. Not yet!


Wednesday, May 23, 2012

A new mono-bath

The first time I tried a mono-bath, I added some sodium hydroxide to a salt fixer, which caused some precipitation of salt. I know trough a friend this is very normal, it is a classic experience in Chemistry to show that the ion concentration of Na in solution keeps almost constant. For that some salt is rebuilded.

I measured, for the salt solution, with a new pH meter bought at ebay, about 4, but that was not correct, a salt solution has a ph varying between 6,7 to 7,3, we may assume that it is a neutral solution. The pH meter showed a different value and to make the solution basic I added sodium hydroxide. For the developer to act you need a basic pH.

After discovering this fact, I decided to give up adding sodium hydroxide and to use just salt and parodinal. This time the process run at room temperature, slightly bellow 20 ºC. The amount of parodinal was 1:100, which I use to develop in two bath developer. The development time was 18 hours, in order to get the daguerreotype effect, a silver compound which reflects more light so that when you see it against a dark background it looks positive. This is only possible from the emulsion side of the film in which the picture is inverted, like it was also in the original daguerreotypes.

I am happy with the results. The film can be used either as negative or positive inverted.

Negative at transparency

Positivated in GIMP

Scanned reflexive in color mode with a black background

Scanned reflexive in B&W mode of the scanner
Recipe:

500 ml salt fixer
5 ml Parodinal

18 hours development (or more) @ R.T.

Tuesday, May 22, 2012

Bad news for Caffcol III

Today, using the same recipe that already worked, I got very weak results, almost blank negatives. I don't know what I did wrong, I am still looking for the reason of the failure. I only regret the amount of coffee that I poured out down with hair dye and soda.

So, please don't use Caffcol III yet. It needs some more tests. I am sorry if you tried and didn't work too.

As soon as I find the error, I will let you know.

Saturday, May 19, 2012

Another way to produce a fixer

This time let us use ammonia as fixer. Normally, ammonia is available at your drugstore. If you have a ventilated place where the fumes don't borrow you, just use it as normal fixer, it takes very short time to act and gives a good transparency.

But, if you have problems to purchase Ammonia, a water solution of NH3, let us use Ammonium Sulfate that is sold as fertilizer in all agriculture drugstore and the equation:

2NaOH + (NH4)2SO4 ---> Na2SO4 + 2NH3 + 2H2O

You will end with a mixture of Sodium sulfate and Ammonia. If you search the properties of Sodium Sulfate at Wikipedia, you will find this curve:

Solubility of Sodium Sulfate in water
This curves means that at low temperature the Sodium Sulfate will crystallize or precipitate.

Recipe:

Dissolve 132 g of Ammonium Sulfate in some 250 ml water in a 1 liter beaker. Do the same with 80 g Sodium Hydroxide in a smaller beaker. Pour the solution of Sodium Hydroxide to the solution of Ammonium Sulfate and mix until most of the stoichiometric reaction take place. Let cool and put in your refrigerator. Next morning you will have the bottom full of precipitate, Sodium Sulfate. Just decant to another bottle and yo will have produced Ammonia, perhaps some 10% solution of Ammonia that you can use as fixer in Photography. The smell of this weak solution is tolerable. It works fine, already tested. And it may be reused, I think, until exhaustion.

21st May:

Important notice about ammonia as fixer:

I found this in the Wikipedia:

« silver chloride (AgCl) is soluble in dilute (2M) ammonia solution, silver bromide (AgBr) is only soluble in concentrated ammonia solution, whereas silver iodide (AgI) is insoluble in aqueous ammonia.»

After fixing a piece of film with ammonia I am going to make the sulfide test.

Friday, May 18, 2012

Fixers


In Photography, and since Sir John Frederick William Herschel discovered that Sodium Hyposulfite, latter renamed Sodium Thiosulfate, could solve silver halides, no other fixer had a chance to continue, among them salt as I proved with my experiments. Salt, Sodium Chloride, can be used as fixer, takes much longer, needs high concentration and temperature to act in a reasonable time. But also Ammonia is a good fixer, it acts in very short time but is not very healthy to bread his fumes.

The two most used fixers are Sodium Thiosulfate and Ammonium Thiosulfate.  The first one can also belong to homemade fixers, prepared as follow:

Weight some 25 g Sulfur, powder (S8). Take 1 liter 10% solution of Sodium Sulfite, prepared like described before. Put it in a Pyrex Flask and put on the stove fire. When the temperature is over 60ºC you may start adding Sulfur and stiring, a little at a time. Go on adding Sulfur and stirring until the solution starts boiling. Put the fire at minimum and let the water evaporate for half an hour. Filter the solution and you have a more or less 20% solution of Sodium Thiosulfate prepared. And, because not all Sulfur will react, some sulfite remain wich will preserve your fixer better.

Resuming, here a list of substances that may be used as silver halides solvents:
  1. Sodium Chloride
  2. Sodium Thiosulfate
  3. Ammonia
  4. Ammonium Thiosulfate
I already tested all of them, they all work. And, although the slowness of salt, it is my preferred because it gives no fog at all and is cheap and one way fixer. No need to store.
About ammonia, I still have some experiments planned in order to improve its use.
If somebody knows other substances that may be used as silver halides solvent, please tell us.

Sodium Sulfite II

If this product could be easily available and cheap, it shouldn't be necessary to prepare it from sulfurous acid like shown in the post before this one. Searching the internet and knowing what this substance is used for, I found it at the site of Aqua Ambiente, with the name of code CTX-12 and known as Chlorine neutralizer for swimming-pools. It is, in fact, Na2SO3, CAS N. 7757-83-7. Besides, they sell the same product with the code name CTX-14 as Bromine neutralizer for swimming-pools.

I already asked for the price of a 6 kg package, I don't think it will be so expensive and can serve for the preparation of developers and fixers.

But I found, by accident (almost) another way to prepare a fixer.

Yesterday I bought very cheap 5 kg Ammonium Sulfate package at an agriculture drugstore. What is this substance good for? Well, I knew it would react with sodium hydroxide, giving something else. So, I prepared two weak solutions of each one and then poured base over sulfate. I made this at my balcony in fresh air, to avoid explosions inside. No explosion, but I could smell ammonia in the air beeing produced in that reaction.

In fact, searching the internet, I found out:

2NaOH + (NH4)2SO4 ---> Na2SO4 + 2NH3 + 2H2O

Ammonia NH3 is also a fixer. And now I will start a new way to prepare another fixer... This time based on ammonia instead of salt.

Actualization: Ammonia is not a good fixer because it doesn't dissolve all silver halides (see in the page Recipes the final note)

Wednesday, May 16, 2012

Sodium Sulfite I

From Wikipedia, we know that
«Sodium sulfite (sodium sulphite) is a soluble sodium salt of sulfurous acid with the chemical formula Na2SO3. It is a product of sulfur dioxide scrubbing, a part of the flue-gas desulfurization process. It is also used as a preservative to prevent dried fruit from discoloring, and for preserving meats, and is used in the same way as sodium thiosulfate to convert elemental halogens to their respective hydrohalic acids, in photography and for reducing chlorine levels in pools.»
I looked for this substance without success. So I decided to prepare it. At an agriculture medicine shop I found sulfurous acid at 6%.

Using the chemical equation:

Na2CO(105g) + H2SO3 (82g)→ Na2SO3 (126g)+ CO2 (44g)+ H2O (18g)

One kilogram of the sulfurous acid solution has 60g of H2SO3. Making the proportion I putted 77 g of Na2CO3 .Weighting the Sodium carbonate to a large bottle, I poured the acid slowly, it makes a lot of bubbles of CO2 and at the end we have about 100g sodium sulfite pro liter, about 10% solution of sodium sulfite.

Sodium sulfite is very useful to prepare photographic baths, from developers to fixers and clearing baths.

Another alternative to Parodinal


Starting from this formula of Donald Qualls.

250 mlWater
30 tablets @ 500 mgAcetaminophen
50 gSodium Sulfite (anhydrous)
20 gSodium Hydroxide (anhydrous)
Mix in order indicated, let stand in sealed container 72 hours before using.  Keep crystals from bottom of container with liquid when decanting, stir before drawing off concentrate for dilution.  Use dilutions and times as for Agfa Rodinal.  Use within 30 minutes of dilution.
Sodium Sulfite is not available for me, and may be for others too. So, I propose following recipe:

2x100 ml Water
20 g Sodium Hydroxide
30 tablets @ 500 mg Acetaminophen (Paracetamol)
40 g Sodium Carbonate (Potash)
500 ml Sulfurous Acid at 6% or equivalent to 30 g of pure acid

Preparation:

Solution A:

First of all, with a mortar, transform the Acetaminophen in powder.
Put 100 ml water in a beaker and 20 g Sodium Hydroxide inside and stir. While hot pour the acetaminophen and stir, one tsp each time until all powder is inside. This solution will be brownish. Let the beaker by side, let us call it beaker A.

Solution B:
Put another 100 ml water in another beaker and add 40g Sodium Carbonate and stir. It will not dissolve all but it doesn't matter. Now go on pouring the sulfurous acid slowly because you will get a lot of bubbles. In this reaction CO2 is produce in large quantity. You will end with less than 500 ml of a solution of Sodium sulfite. Put the solution in a pirex jar and heat it to get the CO2 out, stirring with a spoon. Let the solution cool down.

In a 500 ml bottle pour the content of beaker A. Then wash the beaker with solution B and pour in the 500 ml bottle until this is full. You may have more sulfite left but not much. You have now 500 ml of Parodinal. Let it rest for the same 72 hours before use.

When preparing the work solution, take in account that you end with 500 ml instead of the 250 ml of Donald's recipe. So, you need to double the concentration of the solution, instead of 1:100, use 1:50 and so on.


Tuesday, May 15, 2012

Workshop about homemade Photography

Last weekend I was invited by some students of a college in Caldas da Rainha to teach them how to prepare their own chemicals for B&W photography at home, with products they may buy at the corner.
They were 10 participants, 5 on Saturday and other 5 on Sunday the whole day along.
Common-Salt and sodium thiosulfate as fixers, vinegar or old fixer as stop bath and one of the methods of preparing Parodinal that I use. They took photographs with medium format cheap cameras and developed them to see the results. They were very happy and payed me for the expenses, about 15 euros/each and they went home with a developed 120 roll film supplied  by me, 1 kg salt, vinegar and 250 ml Parodinal in a bottle.

4 of the Saturday group (the fifth was at the darkroom)
The next workshop will be about color photography using products you can buy at the next drugstore.

Monday, May 14, 2012

Followers opinion

Thursday, May 10, 2012

Caffcol III needs more color

The next I am going to increase the temperature and then, if the negs are too dense, decrease the time or the amount of dye in the developer.

But there will be a gap of time now, because I am preparing a workshop for Saturday somewhere else and I have to think in all things I need to bring and prepare papers and so on. This is one of the papers I prepared for the workshop. A collection of articles selected at Wikipedia and transformed in book with Pediapress.

Saturday, May 5, 2012

It is time for Caffcol III

Caffcol III is a homemade color developer for C41 color negative films, that I invented and its recipe is like this:

CAFFCOL III


Homemade process for color negative films

Temperature - 35 ºC

Developer CAFFCOL III (H. Sousa) - 30 minutes minimum duration, 45 minutes recommended.
1 tsp sodium carbonate, aka washing soda
4 tsp soluble coffee
10 ml of a 1:1,5 solution of professional Hair Dye

water to make 500 ml
Bleach and fix as usual.

Have fun developing your films with hair dye, but look after the Ingredients, if it is a PPD-free hair dye it will not work. Some kits have several bottles, but only one, the color developer is what you need, the one where in the ingredients comes something similar to p-phenilaminediamine (PPD).

Example 1

Example 2

Example 3

Example 4
Self-criticism: we can't speak of color, but what you see is also not silver because it was bleached and fixed out. I will be tuning this by rising the temperature and adjusting the film speed. This film looks overexposed because I used it like 50 ISO and it was 100 ISO. Maybe at 40ºC and 45 minutes development the results are better.

My blog is endangered

I am receiving emails from people discouraging me to continue with my experiments, one of them said it would be possible to banish my blog from blogger if I go on telling the people how to make their own chemicals and so on. Shall I take this seriously or are just spammers?

Henritypes

Yesterday I made a sort of daguerreotypes that I will call, modestly, «henritypes» in honor to me, ehehehehe!

Well, you already know my developer-tank, and you already know my recipe for monobath.

So, the henritype consists in a film developed in the monobath made of 1 liter water with 300 g salt dissolved and 10 ml meta-parodinal. The development takes the longer the better, maybe something between 16 and 24 hours at room temperature.


The good side is that you may use the negative as direct positive by reflecting with a black surface as background or as normal negative by transparency. You may scan it as positive with a normal scanner, or as negative with a film scanner or with macro using a digicam.

Direct positiv on film with black background

Positivation of the negative by transparency with digicam macro

Unfortunately, in this 'first', experiment (I already noticed that in a former experiment), I forgot adding the developer to the bath, what I did after starting pouring the salt solution. This gave a transition zone in the whole negative, that made the things a little unsatisfying.

All this was made with a camera Agfa Box Synchro bought at the flea markt for 30 euro, cheap film fomapan 100 ISO at 3.5 euro in Lomography.com and a homemade developer tank from a cookies box with homemade chemicals.

Agfa Box Synchro adapted for interchangeable lenses
Direct scann color

Direct scan B&W

Wednesday, May 2, 2012

Searching the natural

Beautiful ruin tweaked in GIMP
The direct positive was almost B&W. Tuning the saturation of the colors, gave an almost color photo.
Camera: Olympus Trip 35
Film: Agfa Plus 100 ISO shot at 25
Development: Hair dye & Coffee
Digitized with Olympus FE4050
Tweaked with GIMP

What is the point of using hair dye instead of a color kit?

If you are a purist, you want to make photos like normal ones, professionally, with the best possible look, Photography in the sense that it is a very accurate reproduction of the reality, follow the rules, put the exact quantity of components, control the temperature, measure the time with a chronometer, follow the instructions without any variations, unless to correct some not very well exposed negative but be very accurate and make a standard already established for someone who made a lot of shit before he came to that standard procedure.

But that is, for me, no hobby, it is work, hard work and responsible work. Yesterday I refused a work that would take some 2 hours and I would win 40 euro. It was a programming issue, the point is, when you think the client will be satisfied, no. He always discover some point where it doesn't make what he wants and instead of two hours you take the whole week for 40 euro. No, thanks! I made the following proposal: I send you the hard code, the part that I discovered and you may use as much as you want for several sites and make good money for 500 euro. He refused and is looking for someone else who makes it for 40 euro.

Here in this blog, I don't expect for payment, it is my hobby, I am experimenting like many others and sometimes it happens that I discover new things or a new manner to make things work.

The main challenge is to make photos or some kind of photos, without standard commercial products thought for Photography. I even try to make my own cameras and the sensible surfaces using normal materials or products I can bye at the corner.

Now, to the point: why using hair dye for C41 films if the results are not really color but only vestiges of it? In fact, you have on the film dyes, but developed differently, giving almost black and white but no silver is present anymore because it was bleached and fixed. What we have is a mixture of dyes forming a strange B&W picture. Let us take this example, already shown before:

Path to the river
Here we see vestiges of color and they may be there if we «push» them. In normal color photography you can also change the amount of Red, Green and Blue. So, let us make the same here and see what is the best we can do. Using the software GIMP, I could extract the folloing picture that I consider more close to the reality.

Pushing with more red and blue
 But let us assume we are only looking for a good artistic picture, not real, but only pleasant and when people lok they say, «Wow! How is this picture possible?». Then, using tricks that you also can make with normal digital pictures, it is also possible to make things like this:

Violet velvet path

Tuesday, May 1, 2012

Hair dye and coffee

It is a real challenge to develop C41 films without CD-4. Persistence must produce results. Why not using the superaditivity with hair dye and coffee? Everybody will say it is nonsense, coffee is a black and white developer that will compete with the color developer but, from my experience, coffee is a weak b&w developer and also a weaker color developer. It did work in Caffcol I with CD4, it works in Caffcol II in the second bath maybe only lowering the pH but works. And now the time has come to abandon CD-4 as a substance that is not easy to buy and is expensive. Instead of CD-4 I am using now hair dye. Yes, professional hair dye with lots of color developers inside. First I used only hair dye and soda, now I added coffee to the recipe and it gave good results as shown below. The images are not silver, not b&w because silver was bleached and fixed out. Images in fast b&w but from the dyes of the C41 film negatives.

Example 1

Example 2

Example 3
Note:
 I still will not disclosure the recipe, I hope to get better results with some more patience and, why not, some disasters. Well, you may also try it and see how difficult it is to tweak the parameters to achieve an 'uncertain' result.

At the rear of my flat


Without the consent of the neighbors, and because today is a rainy day and I don't want to go to the field like yesterday I did and spoiled an entire roll with too much of all components of the developer (I only got a stain), I decided, after experimenting with a tail of film, to expose some from my balcony to the rear. All 4 photos are in good conditions, I am very happy with the results, good density in all pictures.

I only need to extract more color than it is giving. But I developed only at 25ºC and maybe with a little more hair dye it would be better. By the way, this time I set the ISO at 50 instead of 100 of the film. It was a good decision because I have the impression I gave too little time: 30 minutes development.

I don't want to disclosure now this recipe, before I am more satisfied with the result. It promises. And, look, I used the same professional italian hair dye like in the first fiasco.

I thank you all for your visits


I started this blog last end of January, 3 months ago more or less, I already have 3000 visitors from all the greenish countries of the map. I realize that I have been working hard and getting some results to share with you and I hope you will recognize my efforts. Besides, I don't speak English but, to make the blog more visible, I decided to undertake an extra effort putting my posts and pages in English, a language that will meet more people than my poor Portuguese. But don't forget, you may translate any page to your own language, using the Google translator. And that Google offers you the opportunity of rewarding the blogs you like with their Ads politics.

So, being more clear, please help to keep this blog in a good level. I need scanner, I need chemicals, I need films, I need cameras, I need raw materials and tools, if you want to send your obsolete photo materials, I would be very grateful too, please contact me for the adress, if it is your case.